
Merry-go-rounds are a fascinating sight to behold whether in an amusement park or in your house. Although you may not be able to bring an actual merry-go-round to your home, you can definitely turn some resin into a beautiful miniature merry-go-round that everyone will cherish.
If this sounds tempting, you can get the supplies and follow the instructions mentioned below to make your personal merry-go-round.
Supplies Needed
Following is the list of things you need to make your resin merry-go-round artwork:
- Merry-Go-Round Silicone Mold
- Epoxy Resin and Hardener
- Purple and White Mica Powder
- Small Glass Spheres
- Dropper
- Pearl Beads
- Resin Curing UV Flashlight
- Superglue
- Tweezers
- Heart Gems
- Silver Symbols Wheel Charm
- Small Cups with Thin Spouts
- Stir Stick
- Gloves
Step-by-step Instructions
Below are the detailed instructions that you can easily follow to make your merry-go-round:
-
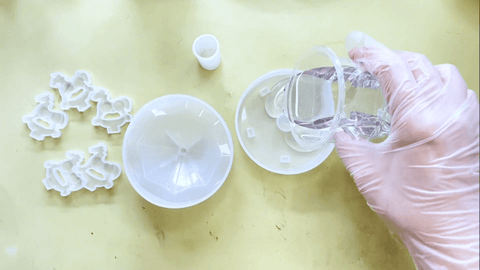
Add Some Resin to Your Mold
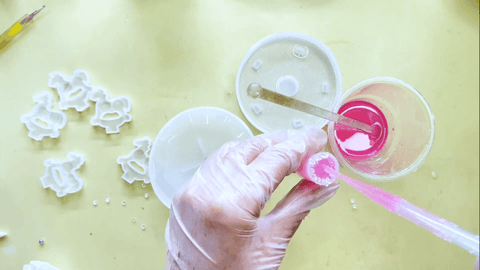
To start your merry-go-round project, you first need to pour some clear resin in the base of the merry-go-round silicone mold half-way through.
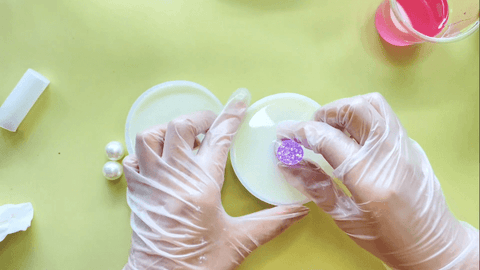
Now, while the base layer is resting for some time, take the same clear resin and add some purple mica powder in it with the help of a stir stick and mix both the components well.
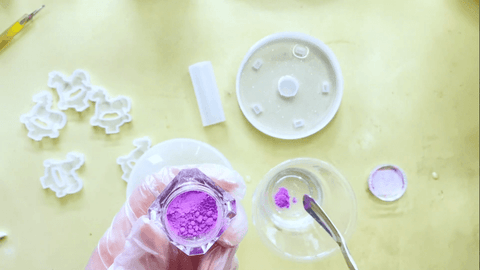
Initially, the color might look pink, but it will turn purple as the powder slowly activates. Here, keep in mind that the more mica powder you’ll add to the resin mixture, the darker the color will get. You should also note that once resin has cured, the color might turn out to be a few shades lighter or darker than expected.
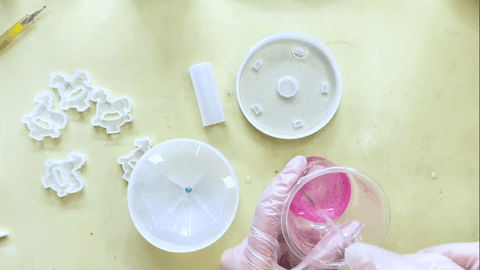
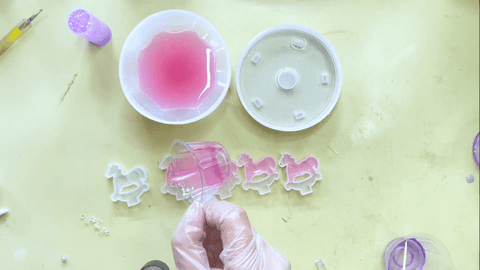
Now, for the next step, take the column of the mold and fill it with small glass spheres.
After this, take a dropper, fill it with the purple-tinted resin mixture, and add it to the column until it is completely filled.
Now take the same resin mixture again and pour it into the canopy of the merry-go-round mold and in the horses as well. Don’t forget to add a blue bead in the space provided in the canopy mold before pouring the mixture in it.
-
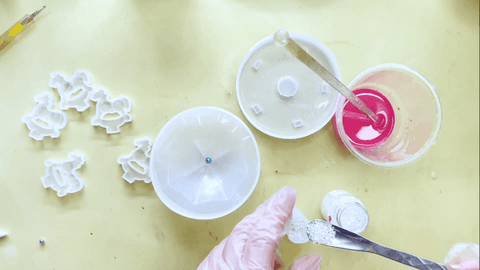
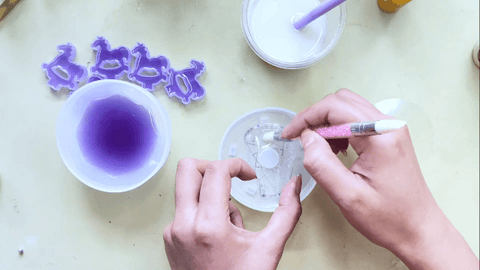
Add Symbols Wheel Charm to the Base Layer
After filling the initial components of the mold, you can now move on to the next part. For this part, take the base layer of the mold that has been filled with the clear resin layer and add a silver symbols wheel charm to it. You can do this by fixing the charm to the gel-like consistency of the base layer by rubbing it with the base of a pen or another tool with smooth base. You can achieve the gel-like consistency by leaving the resin mixture to cure for about three to six hours.
- Add Tinted Resin Mixture and Other Detailing
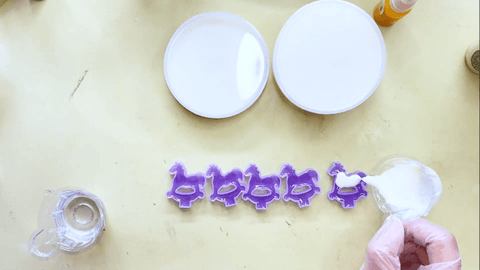
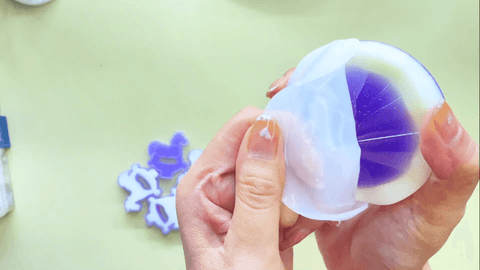
Now, take white-tinted resin mixture and pour it in the base component, canopy, and the horses and leave them to cure overnight.
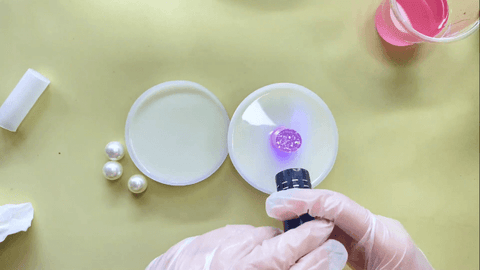
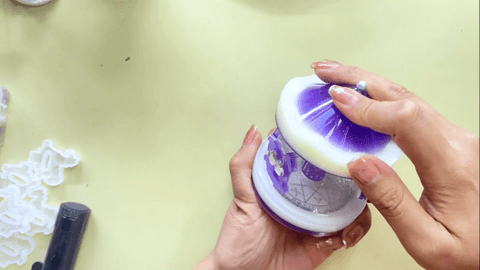
Once all the components have fully dried, you can start by gently taking the column out of the mold and fixing it to the canopy with the help of some superglue.
Don’t forget to dry the glue with resin curing UV flashlight to firmly fix the two components together.
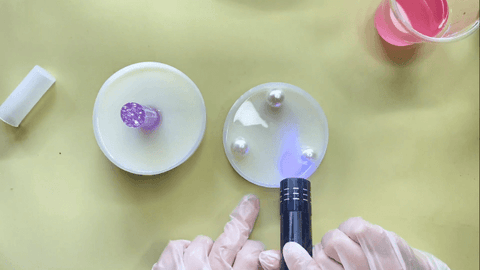
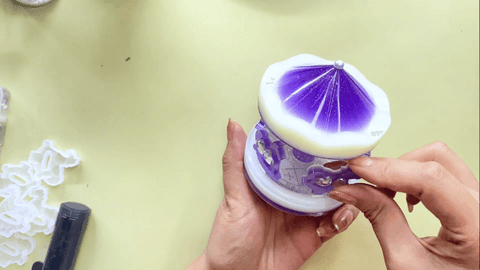
Then take three pearl beads and attach them to the base component with the symbols wheel charm with super glue at equal distance. Again, dry the glue with the resin curing UV flashlight.
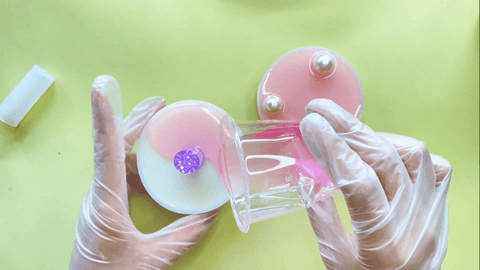
Then, add the purple-tinted resin mixture in the remaining space of the base and canopy component. After this, leave them to cure for about twenty-four hours.
-
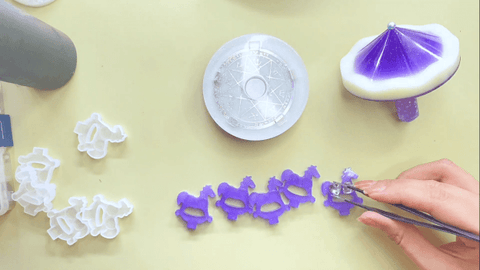
Demold and Add Detailing to the Horses
Now, after the parts have cured, demold them carefully and move on to the next phase of the magical merry-go-round project.
This time, you will be working with the horses. To add details to them, start by using some superglue on the space provided to attach two heart gems to each horse with the help of tweezers and drying the glue with the UV flashlight.
-
Build the Structure of the Merry-Go-Round
Now, attach the horses and canopy column to the base of the mold by sticking them in the dedicated hollow spaces.
Once you have attached all the components to their right places, your magical merry-go-round project is ready to be displayed.
You can place your merry-go-round resin artwork on your simple yet elegant resin coasters for added beauty.

Do your kids want to go to the amusement park for some fun rides? But you don’t feel like going out of your house in crisp winter wind? Resin merry-go-round is a very simple yet exciting solution to this problem. It may not be an alternative for rides you would be able to enjoy at the park, but it is sure to add joy to your and your kids’ day. So, bring out your creativity and include your kids in it too to whip up some magic in the form of resin merry-go-round artwork. Don’t forget to get your supplies for this wonderful project right away.