
Are you a fan of Pikachu? Or do you know someone who loves Pikachu! Then this article is for you! You can make these adorable Pikachu pieces for yourself or gift them to someone. I have simplified the steps as much as possible to make it super easy for you. First, make up your mind about exactly what you want your Pikachu to look like, collect all the required materials, and go through the steps. You’ll then be ready to proceed with this project. We will be making four different Pikachu pieces, each one in a different colour and facial expression. Just go through these steps and make sure to follow them carefully, and you would have no issues in creating this project.
Things you will need for this project
Before you begin this project, there are some essential items you need to collect. Once you have all these, you’re ready to take the first step and begin this simple yet adorable project. Here is what you would need.
- Epoxy and hardener
- Yellow paint to add colour to your resin mixture. You can use any colour but as Pikachu is originally yellow, we will be using yellow.
- Permanent marker in black and red colours to add face details according to Pikachu
- Marker to outline on a holographic sheet
- Scissors to cut out the outline you made on your sheet
- Holographic sheet for one of the moulds
- Four resin moulds in Pikachu shape
- Purple glitter chunks or any glitter you want
- Multi-colored glitter chunks or any glitter you want
Here are steps you need to follow
Step 1 Preparing resin mixture and other material
Divide your resin mixture into four equal parts. One part will remain clear and will be used to add the base layer in all four resins and mainly in the holographic piece we make. Another step you need to do for the holographic piece is to take your holographic sheet and, with the help of a marker, trace out the exact shape of the Pikachu mould. With the help of scissors, carefully cut it out. Keep it aside for now. We will be making a Pikachu in yellow colour as well as that is the original colour. For that, mix yellow paint into the second part of the resin mixture you prepare. For the third part of the resin, add purple glitter chunks. For the fourth part of the resin, add in the multi-coloured glitter chunks. Now you would have four different resin mixtures to make four different Pikachu pieces.

Step 2 Adding face details with a marker
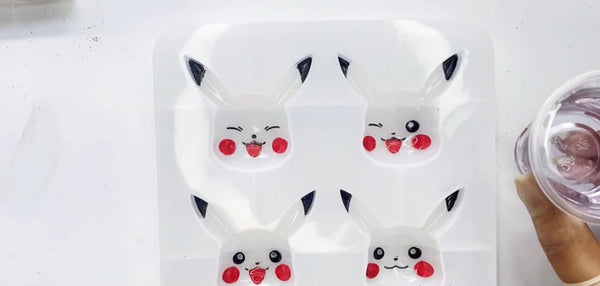
Take your resin mould and with the help of a black marker, start adding details of Pikachu’s face. You can use a picture of Pikachu for reference. Start by making the eyes and eyebrows. Next, make the nose and mouth. Add other facial lines to make the face resemble that of Pikachu. Use a red marker to make the cheeks and add more details to the mouth area. Do this on all four moulds. Try to make this as neat as possible as this will be the front part of our pieces. Remember, we want to make different facial expressions for each mould. Winking face, smiling face, blushing face and tongue face are a few options you can do.
Step 3 Pouring in the resin mixture
Now pour a thin layer of clear resin into all four moulds. This will be the base of all our pieces.
![]()
In one mould pour the purple glitter mixture on top and make sure to fill the mould till top. In the second mould add the multi-coloured chunky glitter mixture. Now take your third mould, fill it halfway with clear resin.

Then, take the holographic sheet that you cut and place it on top. You can use a tweezer to place it if you want. Top it off with another layer of clear resin and ensure the mould is filled to the top.

Pour in the yellow resin mixture to the last mould that you have left. Make sure the mixture is balanced on the top. The main part is now done.
![]()
Step 4 De-molding
This will be the final step. Keep the moulds aside to let them dry. Wait for the resin to harden up and keep checking. Once it is completely dry, now is the most fun part of this project. It’s time to reveal the final project. We will now be taking our pieces out of the moulds to see how they turn out. Carefully de-mould all the pieces and Tada! You now have your very own Pikachudecorative pieces.

Congratulations! You’re done with this project! It was easy to follow.
The steps are easy to follow, and there is nothing complicated so start making this as soon as possible. This project will give you not one but four different Pikachu pieces so that you have a choice and options. You can also personalise it according to your preference. For example, you can change colours, glitters or facial expressions and make what you love the most. Make it however you like it. There’s no right or wrong.
You have these four super adorable Pikachu decorative pieces. You can use it to decorate your room or study/office table. Something like this always adds a personal touch. You can also use this as a paper weight holder. It looks cute and gets the job done! Furthermore, this can also make a pretty cute gift for a Pikachu lover.