
If you have decided to start making resin art, that means you need as much expert information as possible. We have collected tons of useful pieces of advice for you and will make your resin tutorial as productive as possible. Happily, we know about resin art almost everything, so, be prepared to dive into this topic with us. We have created this article, especially for you since we are sure that your resin art-making learning is just off and running. So, review our top tips and tricks about how to make resin art the best it can be.

How to Choose Resin for Your Piece of Art?
One thing you should know for sure that there is no unique resin that is good for every piece of art. It means that the resin you put on your art surface may not get the best results in molds. So, how to choose the best resin for what you want to accomplish? Answer two simple questions: are you going to put your resin into something with sides or you will coat a surface? Are you going to fill something or coat? There is a big difference between the above-mentioned meanings. When we speak about sides we assume that it can be a mold or a hole in a piece of wood that you will fill in. When we speak about a surface we mean that you will get a thin glossy coat on that surface. It may be artwork, a tabletop, table, tile, river table, etc. If your purpose is to fill in a mold then you need a thin, watery consistency resin. If you have a surface to coat with resin, you need thick consistency resin. With such resin, you can coat artwork surfaces, countertops, tumblers, tabletops, etc.
Nuances of Choose the Resin
It is important to understand what kind of resin is needed to work with. The resin for beginners is epoxy. It is forgiving to work with. It does not require technical skills, expertise, and equipment. Other options are polyesters or polyurethane resins. In terms of mixing, resin and hardener polyesters are fussy. Polyurethane resin is moisture-sensitive and does not tend to have much time.
What do You Need to Create Resin Art?
So, if you want to know how to your first resin art then these 4 simple steps will help you have an idea about the entire process.
Measure. Do not forget your nitrile gloves. Pour resin and hardener into a mixing bowl. The amount of both should be equal.
Mix. You should stir the components together for at least 3 min.
Pour. After ensuring that everything is ready, pour your resin over the work.
Wait. Since artistic resin needs sitting at least several hours, let it fix. Place it in a dust-free space.
For the right and safe creation of your first resin art you will need:
- Respirator mask
- Nitrile gloves
- Board or a tray
- Box to cover your ready work
- Level
- Heat gun
- Spreading tool
- Liquid and powdered pigments (if needed)
- Blocks or stands to pop your ready resin art up with
- Mixing cups and stirring sticks
- Isopropyl alcohol (70%+)
- Thick plastic sheeting
- Box to cover resin work
Now it is time to select high-quality resin. Many brands offer quality artistic resin. However, it is up to you to choose the brand. The only thing you should not forget about is that your resin must be of really good quality and meet such quality characteristics like:
- Easy missing ratio (1:1)
- No yellowing
- Low-odor
- Long work time
- Affordable
Such characteristics will help you work easily and create amazing and quality resin art.
Liquid Pigments
Be careful in choosing liquid pigments since the market offers a lot of them today. Do not try buying cheap ones. Cheap pigments may cause a dangerous situation when reacting with the fire (when using an open flame to remove bubbles). Try using only oil-based pigments. They are safe and you can buy them at an affordable price. Add only a few drops of pigment and mix resin for at least 60 seconds before deciding to add more. Control your pigment amount since more than 6% will throw hardener ratio and the resin as well. Uncontrolled use may affect the drying process of your ready resin art. It will not dry properly.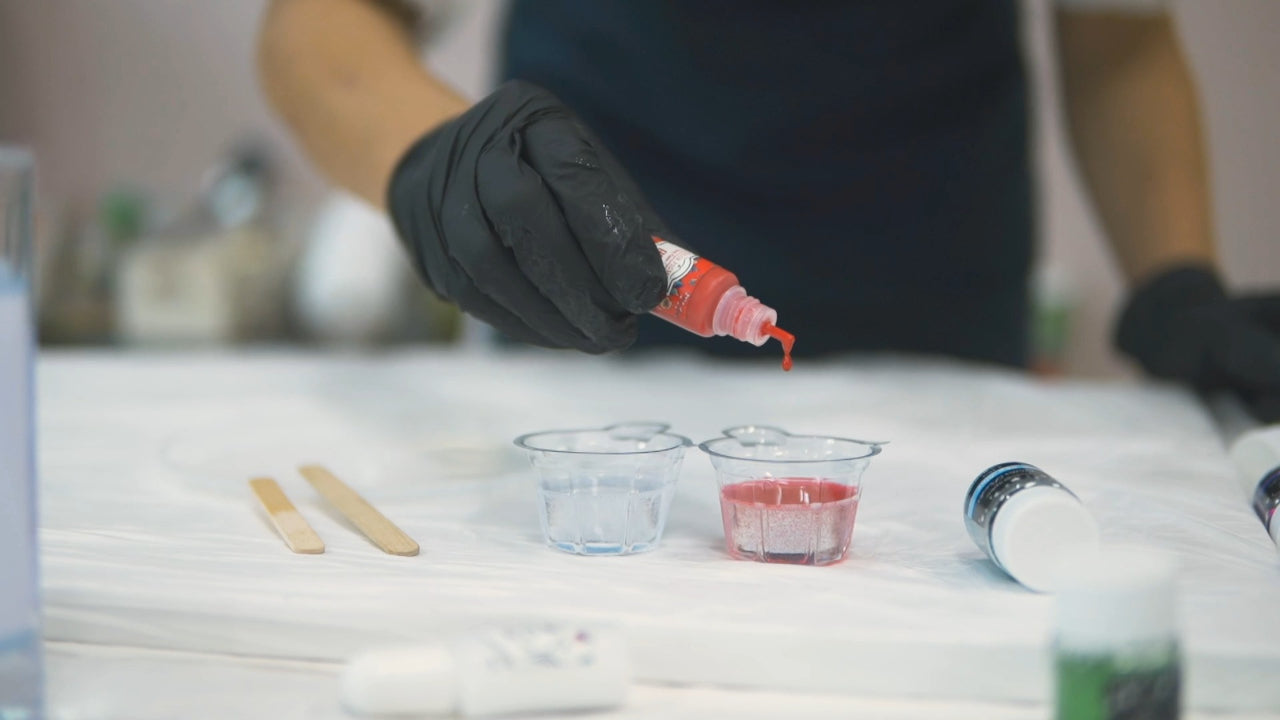
Powdered Pigment
Mica powder is used in nail polishing and makeup. Due to its highly pigmented characteristics, it is used in resin art as well. It can create lovely textures, sparkles, and color shifts. Similar to liquid pigment, it is recommended to control its amount. This powder can upset the resin ratio, so, think twice before using it. 
- Kitchen Roll
It helps remove any excess resin inside the measuring cups.
- Isopropyl alcohol (70%+)
You will need to remove the rest of the resin from the measuring cups.
- Stirring Sticks and Mixing Cups
Depending on the number of colors choose the required number of mixing cups. Many resin art makers use disposable cups while others use recyclable ones. Choose the number of your stirring sticks similar to the number of your colors. For the best and more effective result use a flat stirrer.
Heat Gun
A heat gun is a great way to create different effects such as lacing.
A heat gun is a great way to create different effects such as lacing.
A heat gun probably is the most important tool that helps create smooth and clear resin art without bubbles. You can remove bubbles from your resin with the help of a toothpick or pop them manually. Many resin art makers use alcohol spray to pop bubbles. However, it is not recommended to do this since adding contaminants will cause drying problems.
Stands or Blocks to Prop Your Art up With
If you will pour resin on something flat, then it is important to raise ready resin work off from your work table. Commonly resin drips off the edges, so, if you have a flat board and table then you face trouble while getting resin. It will just get back off in one piece! Think about using something similar to blocks or stands. They should be of the same height to keep your resin art safe.
Level
It is crucial to have a flat surface while making resin art. So, if you want to create perfect resin art, then use the level for smooth and evenly poured medium.
Nitrile Gloves
These gloves are the only way to protect your hands from toxic resin. Nitrile gloves are oils-resistant and aggressive chemicals.
Respirator Mask
Resin releases to your health fumes. Invest in a quality respirator mask if you going to work with large pieces requiring large quantities. No dust mask will protect you from harmful fumes. However, if you plan to create only one small piece then do not use a mask.
Thick Plastic Sheeting
Since resin art is messy try covering your work surface with a plastic sheet. It will help catch any drips. Once your work has dried you can peel it off.
Spreading Tool
Different resin art makers use different spreading tools. As a rule, it depends on the amount of resin needed to move around and the effect that is necessary to create. You can use reusable plastic spatulas. After, simply wipe the plastic down with a piece of kitchen roll. Then wipe down it with isopropyl alcohol. Next time you will be able to use it again.
Box to Cover Work
Your finished work is needed to be left fully cure. Commonly, it is recommended to let dry within 24 hours. Think about a preventive cover that will save you resin art from dust particles and hair. Try finding something big enough to completely cover your work. It can be some plastic or wooden sheeting.
Board or a Tray
The colors that you choose for creating your resin art may impact the surface you are going to pour the resin on.
Creating Your First Resin Painting
Think about your design and the overall look and feel of your piece. Choose one from a wide variety of pour techniques like dirty or puddle pour, flip cup pour, etc. Now it is time to start.
- Provide well ventilated, clean, and dust-free work area.
- Put on something simple that you can throw away in case of getting messy.
- Prepare your work area. Lay down plastic sheeting on a table.
- Prepare your substrate. In case when you are planning to pour resin onto a canvas and leave it side-free from resin, put your decoration tape on.
- Place the substrate on top of the stands.
- Use the level for creating an even and well-poured medium. If you see a misbalance, then put something under the stands.
- Put on nitrile gloves. Since safety is first, we strongly recommend complying with safety rules, since resin is highly toxic. Before getting started, do not forget to wear your nitrile gloves. Ensure that you work in a well-ventilated area and on a surface coated with wax paper. It will be much easier to clean up spills on such surfaces. However, it is better to work outdoors.
- Measure out the needed amount of resin according to the instruction of the manufacturer. Different brands have different instructions on the recommended amount of resin. So, read the instruction carefully before you start.
Now, are you ready for the creative work?
Remember that this is going to be your first resin art and of course you will make mistakes until achieving the required level. All resin-making processes can be divided into several important steps. By observing the rules of each step, you will easily learn resin art-making. So, let us go.
- Step 1 Prepare Your Working Area
Get ready and of course, prepare your working space. Since resin is toxic and needs plenty of space, think about it beforehand. Prepare the surface for the painting and extra space that will be enough for dripping resin. Before you start working on any sort of resin projects, you'd always place it up high because the resin would pour out and it will drip over the edges so if you have it directly on your table when the resin sets, it's actually going to set to your table. Remember that resin needs to dry for several days, so, provide a room for this purpose beforehand.
- Step 2 Provide a Proper Surface
Provide a proper surface for your resin art. There are many surfaces that you can you like tiles, canvases and, etc. So, think about which one is the most appropriate for you. Working with stretch canvases is not recommended when you're creating art for a few reasons because stretch canvas is stretch across the resin when it goes on and tends to sink into the middle due to it's self-leveling.
- Step 3 All Things Set Up
Gather your safety and other supplies on a table so you can make your first resin art without any trouble and missing items.
- Step 4 Calculation
Ensure that you have calculated everything correctly. Many specialized websites offer their resin art calculation services. So, choose one of them and determine how much resin do you need for a certain type of project.
- Step 5 Back Preparation
Since resin tends to drip off the sides add a layer of painter’s tape under the ready project. You should place something that will protect your art from drips around its edges. So, you can place cups or something that will protect your art underneath. 
- Step 6 Use a Level
For even balance use a level. A smooth surface is the best guarantee for high-quality resin art. Use a level to prevent any shift of resin.
- Step 7 Read Instruction
Always read the instruction before use. Despite a wide variety of artistic resin on the market, every resin is different. So, should need exact and clear how much of the resin and hardener to mix together.
- Step 8 Apply Resin to the Surface
In contrast to colored resin, it is easy to apply clean resin. You should know such things as mixing color and tones and how to blend them to get a new color, etc. You can find many ways describing how to pour colored resin on the surface, but one of the proven ones is to pour and let them blend. It is the easiest method that will help you pour colors and work with them. 
- Step 9 Apply Heat
Heat can help you remove bubbles and create amazing designs on the surface. Use a heat gun and create unique designs.
- Step 10 Cover Your Work
Your resin artwork will need up to 7–8 days to be ready to dry. However, most of them are ready after 24 hours. Ensure that there is no hair, dust, and any other microitems on your resin.
- Step 11 Frame and Hang
Keep your resin art away from cooling, heating and devices, and direct sunlight. Enjoy your first art or present as a gift to your loved ones.
Tips and Tricks
If you are planning to use different colors, then pour the mixed resin into mixing cups, one for each color. Take a few drops of a liquid pigment. If you use powder pigments, then gather them with a lollipop stick. Mix it thoroughly. If you want to create visual cells, then add a few drops of silicon and mix it well again.
Bubbles
Now when you have everything mixed pour and create your resin art. To move the resin along the tip of your canvas or use a spatula. Bubbles often appear on resin once you pour it, so, use your torch to remove them effectively. However, keep in mind that you should use your torch very carefully and quickly. Just lightly run it over the bubbles.
Curing Time
Different resin brands have different curing times. It is recommended to make a piece as quickly as possible otherwise it will become like chewing gum. After you have poured your resin make sure that there are no dust particles or hairs on it. Remove them with the help of a toothpick and let the resin cure.
Cover your resin art with something similar to cardboard. You need at least 24 h to let resin get hard. However, it can still be damaged if improperly handled. It is recommended to wait for up u to 3 days to cure.
Effects
Many resin art makers love creating crafts with metallic effect. There are many various techniques that help achieving such effect, but all of them are called "Cold-Casting". It is a term that describes the entire process. As a result, resin art makers can get an appearance of a solid metal. There are various powders such as nickel silver, bronze, aluminum, brass and copper that can help to get the desired effect. To give your resin an effect of metallic just mix metal powder into your resin, mix it well until you get creamy and thick substance.
How to Clean Up
You can easily remove any residue that is left inside mixing and measuring cups. The most common way is to upside down the cups onto thick plastic sheeting. This way you will let the residue slowly run out of the measuring and mixing cups. We recommend leaving them up to 5 h and pull them up by removing hardened resin from the table.
Isopropyl alcohol is the best remedy to clean your used tools after work. After spraying it onto the surface take a kitchen roll and wipe your tools carefully.
In rare circumstances, you can have resin on your skin. To remove it use vinegar. Also, wipe the rest of the vinegar with soapy warm water. It is not recommended to use isopropyl alcohol that can burn your skin or make it dry.
Valuable Tips
- When you create your resin art for the first time, ensure that you use only 2-3 colors.
- Try choosing the right measurement of resin for a certain type of work. Many specialized websites will help you to easily calculate the right amount of resin for a certain project.
Well, hope we could discover all details of the topic of how to make resin art to the full extent. Resin art-making is a very creative process but it requires a piece of certain knowledge and patience. Try creating your first resin art and show it to your friends and relatives. Let them be experts and tell you their opinion.
For sure, you will have many attempts before you create something amazing since you still should learn the basics. However, it is worth that. If you want to become an expert and know all about how to do resin art, carefully work out each of our steps described above.