
Silicone druzy inserts are a popular choice for adding a unique touch to resin crafts. Embedding them in resin is a great way to create a crystal-like effect. Not only do they add some serious sparkle to your artwork, but they can also save you some resin since the volume of the druzy piece helps keep the shape of your project. In this tutorial, we'll walk you through the process of how to use silicone druzy inserts in resin.

Materials needed
- Silicone Druzy Inserts
- Epoxy Resin
- Resin Molds
- Transparent Resin Dye
- Mixing Cups and Stir Sticks
- Demolding Tool (such as a craft knife or tweezers)
- Isopropyl Alcohol
- Protective Gloves and Respirator Mask
Preparations
We recommend using a resin that can untrap the bubbles easily, or you can consider using a thin deep pour resin. Mix the resin according to the manufacturer's instructions and suggested ratio. You can add whatever color dye you want, but please make it light and transparent. When working with druzy inserts, it's important to use a transparent resin to get the best crystal effect.
How to Use Silicone Druzy Inserts in Resin
It's easy! Here's the step by step tutorial.
- 1. Pour the prepared resin into the mold to cover the main corners.

- 2. Squeeze the mold several times so that the resin can reach to the corners. This way can help remove the bubbles around the corners.

- 3. Soak your druzy insert in the resin beforehand. Gently rub it with your fingers or the stir sticks to make sure the resin gets into all the little crevices. You can also spray some isopropyl alcohol on the piece to help release bubbles.
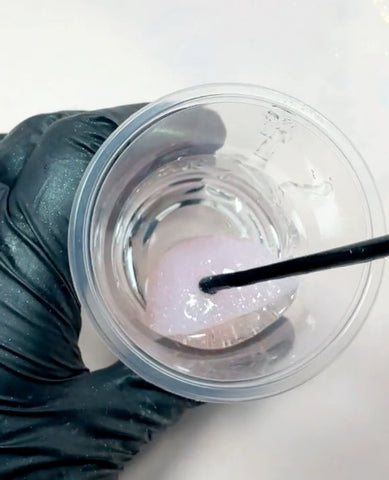
- 4. Continue pouring resin into the mold until it is about 5mm from the exit. It depends on how big your druzy insert is, and how much resin the insert displace.

- 5. Use tweezers to place the druzy inserts in the resin of the mold. Continue filling with a little bit of resin from the edge of the mold. Be careful not to let the resin completely cover the top of the piece. You can use tweezers to reposition it if needed. Be gentle as pushing on the insert too hard can cause it to sink into the resin and create a mess.


- 6. Allow the resin to set for 24 hours before unmolding. Avoid moving the mold or trying to torch the resin, as this can cause bubbles or other imperfections in the final product. When the resin cures, peel the silicone insert carefully and not to damage it or scratch the surface of the resin. Then you can demold.

Voila! We successfully embed a silicone druzy insert in resin and create a beautiful crystal-like effect project!

Conclusion
Just follow these simple steps, and you'll be able to create your own beautiful resin art with druzy clusters. Have fun and enjoy the process!