
Hey Creatives! We were doing resin experiments and found a way to create rainbow effect in resin very easily. By using this method, the colors of the rainbow will transition more naturally and smoothly. OK! Let's get straight to the point.
Tutorial to Create Resin Rainbow Effect
1. Mixed your epoxy resin properly and divide them into small cups.

Be sure to mix your resin and hardener according to the manufacturer's instructions. Stir the epoxy slowly in the same direction to reduce the bubbles. After that, divide the liquid evenly into small disposable cups.

2. Add an appropriate amount of alcohol inks to the epoxy resin in the disposable cups.

Please note that the volume of the ink should not exceed 6% of the resin, otherwise the resin may not cure and might be tacky.
3. Mix the resin with the alcohol inks thoroughly until they completely blend into each other, and then prepare the mold.

Wait about 20 minutes until the resin becomes a little thicker. About the waiting time, it is recommended that you test it several times according to your actual situation. Because the resin used by each person may be different, and the temperature is also different. These factors will affect the time it takes for the resin to thicken.
4. Use a clean syringe to draw up the resin in the order of your preferred colors.

We prefer to do it in reverse rainbow color order: purple, blue, green, yellow, orange and red. But before sucking up the resin into the syringe, we suggest that you calculate how much resin your mold will require and how much of each color of resin you will need. For example, our coaster mold needs about 18ml resin. Then we will need to draw up 3ml per color.
Please be careful when sucking resin to avoid sucking in air, otherwise the bubbles will rise up and pass through all colors of resin, causing the colors to mix.

5. Use Z-shaped movement to squeeze the resin into the mold.
If you want to make the colors more visible, pay attention to control the end of each color at the end of a move.
6. Use a torch or other methods to remove the bubbles from the resin. Wait for the resin to harden and demold after cure.
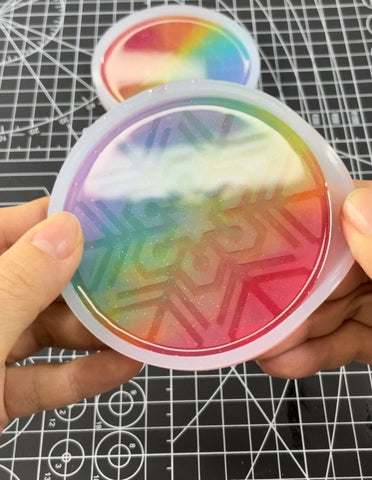

It's done! Very easy, right? You get a very natural rainbow colors, and you don't have to pour the resin from the cups one by one. This method can be applied to other colors too. The possibilities are endless. Hope you enjoy this tutorial. We look forward to see what you create! Feel free to comment below to let us know how you like this tutorial.
1 comment
What size syringe do you use? Love the softness.