
Most commonly used for jewelry making, metallic bezels, and small molds, UV resin takes craft projects to a whole new level. But what exactly is UV resin, how does it work, and which resin kit is the best option for the project? In this ultimate guide, we'll take a deep dive into these questions and more to help get you equipped with the fundamentals when using UV resin.
Quick Link [hide]
1.1 Characteristics of UV resin
1.2 The comparison between UV resin and epoxy resin
2 Applications Of UV Resin
3 How To Choose UV Resin
4.2 How to choose color pigment
5.1 Supplies needed to work with UV resin
5.2 Step by step instruction
6 Cautions When Working With UV Resin
7 Frequently Asked Question
What is UV Resin
When we talk about types of resin, UV resin is the easiest to work with. IntoResin UV resin falls under the synthetic resin category. It is also called 1-part resin as it does not need to be mixed with anything else. It remains liquid until it is exposed to sunlight or UV light.
Characteristics of UV resin
UV resin is excellent for DIY projects. They have several characteristics that distinguish them from other types of resin.
- Fast Curing. UV resin has fast curing (hardening) speed.This is the reason it is known as quick curing resin. Because of it’s quick curing, projects can be completed quickly and in less time making it perfect for small DIY projects.
- Longest Pot Time. Pot times the time during which the resin will maintain its liquid state. Since UV resin does not require a hardening (curing) agent, the pot life of UV resin is much longer than other kinds of resins. It will harden only when it is placed under direct sunlight or UV light.
- Cures At Low Temperatures. UV resin does not require high temperatures to cure.
Depth. UV resin can only be used in projects where the required layer thickness is not more than 3mm to 4mm. In the case of a thick layer, you need to make extra layers of resin. - Shelf Life. The shelf life of UV resin is very short, only six months. If the resin didn’t work well, you must check for its expiry date.
The comparison between UV resin and epoxy resin
When shopping for the best resin for the project, you may consider epoxy resin as another option. Many compare UV resin alongside epoxy resin due to some similarities. However, there are noteworthy differences between UV resin and epoxy resin. From durability and quality to curing time and application, it's essential to understand the differences between the two types of resin to determine which fits the project's needs best. Here are a few significant differences between the two:
- Curing Time. Epoxy resin can require several hours or even days to cure fully, whereas UV resin cures in just a matter of minutes.
- Durability And Quality. Epoxy takes the win for durability and quality, but not without the extra work. Epoxy should be maintained regularly to last. UV resin can harden within minutes, making the process much faster and efficient, but it is still prone to wear and tear from heat and scratches.
- Curing Process. Unlike epoxy, UV resin is a one-step process with no measuring or mixing required. On the other hand, epoxy is a two-step process that combines resin and hardener to achieve a glossy, transparent finish.
- Application. UV resin is cured under a UV light layer by layer,so it is not feasible for big projects,while epoxy resin can be applied on more complex projects.
- Price. UV resin is more costly than epoxy resin.
Applications Of UV Resin
There are various application capabilities that UV resin has to offer. While the resin is a popular tool for jewelry making, it can also be utilized for craft decor and more. UV resin has become the ultimate DIY tool for crafters.
- Resin Jewelry Making

UV Resin is ideal for jewelry making, whether it be earrings, pendant necklaces, bracelets, and much more. Due to its fast-curing application, crafters can produce twice as many pieces of jewelry. Not to mention, the resin does not give off any odor and results in a fully cured and transparent surface.
- Craft Decorations

- Wood Pieces
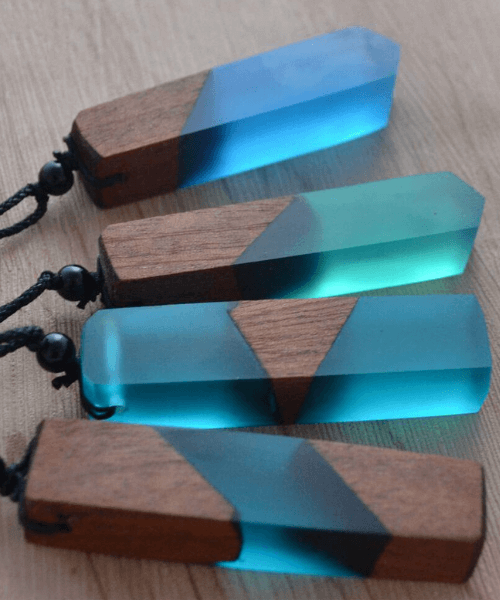
Another form of material that can be used with UV resin is wood. While the application process can be a little more challenging, the result is much more rewarding. With wood resin projects, the application is similar to other materials, but it comes down to the shape of the wood and if it needs to be resized to fit the project's needs.
- Other Uses
UV resin can be used for sealing small surfaces of collages,making cast figurines,and finishing layers of projects by mixing it with colorants and glitters.Also,it can be used as epoxy resin adhesive due to its short curing time.
How To Choose UV Resin
UV resin should be selected keeping in mind the following factors:
- Type of Project. Resin should always be selected, keeping in mind the project. Not every resin works for every project. If you are making a jewelry piece, you require a resin that cures fast and gives a glossy finish to your project. So UV resin makes a perfect resin because it ticks all the boxes.
- Air Bubbles. For any project, you need a resin that forms lesser air bubbles as the bubbles on the surface of the project ruin the look. Select a UV resin that makes little to no air bubbles, so the project looks flawless.
- Curing Time. UV resin should be selected based on its curing time. Most UV resins cure under UV light in 1-2 minutes. A good quality UV resin shouldn’t take more than that to cure.
- Transparency. Since UV resin is primarily used in decorative projects and as final layers, it should be transparent and clear. If it doesn’t give a clear look, it surely isn’t a good quality UV resin. However, colored UV resins are also available. So, if the project requires colored UV resin, you can always use colored resin.
- Price. Most often, low-quality products are priced low. Do not opt for cheap UV resin, as it can ruin your project. Always buy high-grade UV resin, no matter how costly it may be.
How To Select UV Resin Kits
It's important to choose a suitable UV resin kit as there are several different kits available. Some may include a UV lamp or even a UV flashlight. Others will have specific types of casting molds, whether it be silicone, metal, or wood.
How to choose a UV lamp

The first thing to consider is the power of the light to ensure it can successfully harden the UV resin. If the UV lamp isn't powerful enough, your UV resin may not cure and will be sticky. We suggest using a 24W UV lamp or higher wattage. Secondly, you need to choose the right size UV lamp according to the size of most of your UV resin projects. A small lamp is difficult to cure a big project at once. Other things to consider are the quality and the convenience of the lamp.
We recommend this SUNUV 24W UV lamp to cure UV resin projects. It cures fast and is large enough to hold jewelry or other craft pieces underneath. We love that we can put the lamp over our projects without having to move the projects. It's also very lightwight and easy to use. If you have enough budget, you can consider Let's Resin advanced two-sided UV lamp. It's a larger 24W lamp that offers double efficiency. You don't have to turn your UV resin project over for the lamp to cure the other side. This advanced lamp will illuminate and harden your piece from above and below simultaneously.
How to choose color pigments

How To Use UV Resin
If you are using UV resin for the first time, these guidelines will help you start and finish the project.
Supplies needed to work with UV resin:
Make a list of all the required materials and buy them from local market or any online store, whether it is a decorative item or a piece of jewelry, you need the following supplies as a starter.
- UV resin (buy excellent quality resin for a perfectly finished project)
- UV lamp or UV torch
- Silicon mold
- Color pigments or liquid ink in desired colors
- Measuring/mixing cups
- Popsicle sticks or stirrers
- Respirator or face mask
- Gloves
- Embellishments (glitter, dried flowers)
Step by step instruction:
- Working with resin can get messy, so cover your workplace with cardboard, foil, or plastic sheet.
- Place all the materials within your reach, so you don’t have to move around when you need something.
- If the project requires a colored resin, pour the resin in a measuring/mixing cup and add colors. Mix the color with a stirrer.
- If transparent or clear resin is required, you can pour the resin directly in to the mold.
- Since UV resin is applied where a thin layer nearly 3-4mm is required, pour the resin in a mold measuring up to 3mm for perfect setting and curing.
- If multiple layers of resin are required, you should let the first layer harden and then pour more layers. You can check by inserting a toothpick to see if the layer has hardened or not.
- You can add embellishments like glitter, dried flowers, or luminous pigments to enhance the product’s beauty.
- UV resin hardens under UV light,so hold the lamp or torch close to the surface of the resin for a few seconds to a couple of minutes.

- Be very careful while working with UV resin as heat is produced due to a chemical reaction when curing.
Cautions When Working With UV Resin
When working with UV resin, there are a few tips and tricks to keep in mind to produce the highest quality resin piece, such as temperature, storage, and even the environment. Here are some caution tips when working with UV resin:
- Cleaning. Be sure to use Acetone to clean off any leftover resin from the tools used.
- Environmental. Applying UV resin should be done in a well-ventilated space. While it might not have much of an odor, it is still a chemical being used.
- Storage. Try to avoid direct sunlight as it can cause the resin to flake and dull down.
- Equipment. A UV-supported light should be used to cure the resin. Tweezers are also helpful for placing small, delicate pieces together.
- Temperature. Keep the resin in a dry and cool place between 32 and 77 Fahrenheit.
- Avoid Blistering. Embedding various elements in the project can also cause blistering. It can be avoided by laying the elements flat and pressing them down on each layer of uncured resin.
- Air Bubbles. Air bubbles produce when pouring the resin and mixing colors. The mixing process should be performed at a slow, steady, and gentle pace to alleviate the bubbles. Before curing, If any air bubbles form, use the sharp end of the mixing stick to pop the bubbles.
- Safety. Always wear the proper safety gear when using any type of resin, such as safety goggles, a respirator, and disposable gloves. Resin tends to soak through clothing easily, which can irritate the skin and potentially stain the clothes. Consider wearing protective clothing that can be dedicated to resin use.
- Finish. The appearance of a UV resin finish does not always have to be a one-way street. There are options to create stunning pieces that are gloss, matte, or even iridescent, depending on the type of UV resin used.
- Patience is key. When working with any kind of resin, it is best to be patient throughout the process to achieve the best results. Taking the time to pour each layer and cure them one at a time will save the stress of air bubbles forming and having a poor quality product in the end.
FAQ
We understand there might be some questions about the use of UV resin, so we've gathered some of the most commonly asked questions to help set you up for success.
How to tell if UV resin is fully cured?
To test if the resin has cured, use a toothpick to check the condition of the surface. If the surface is not completely hard, it still needs time to cure.
How long does it take for UV resin to fully cure?
On average, it can take about 15-25 minutes for the UV resin piece to be fully cured. Epoxy resin can take a few hours up to several days. Some high-powered UV lamps can cure items within 3 to 5 minutes, depending on the wattage. For fast curing time, strive for at least 4 watts.
What does it mean when the UV resin is not shiny?
It depends on the mold being used to produce the resin design. Silicone molds can be matte, which will result in the resin curing as a dull and matte finish. If the mold is shiny, the resin will be as well.
How to maintain UV resin for long-lasting durability?
To preserve the condition of resin products, use a dry, soft fabric to polish the piece. You can also run light-pressured warm water to rinse off dirt and dust.
Why is the resin still tacky after curing?
It is entirely normal for most UV resin finishes to be slightly tacky after a few minutes of curing. It's good to let the piece rest alone in a dark, cool place to complete the curing process. It helps to cure thin, individual layers at a time to reduce the tackiness.
Conclusion
As someone new to the world of resin, exploring UV resin for projects is a great way to get the feel of what resin is all about. UV resin is especially ideal for small time-sensitive projects and can still produce high-quality results. It is essential to do thorough research on the types of UV resin on the market today as each resin can offer different possibilities. This ultimate guide to UV resin for beginners helps set you up for success on your next resin project!
4 comments
@Georgette Motyka If you’re experiencing scratch marks on the cured UV resin after scratching it, it’s possible that you may be under-curing the resin or not applying enough resin layers. Here are a few suggestions to improve your results:
Check the curing time: Ensure that you’re giving the resin enough time to cure properly. While you mentioned using a nail light for 3 minutes, some resin brands or thicknesses may require longer curing times. Refer to the manufacturer’s instructions for the recommended curing duration.
Apply multiple thin layers: Instead of applying one thick layer of resin, try applying multiple thin layers. Each layer should be cured properly before adding the next one. This helps ensure thorough curing and reduces the chances of scratching the resin.
Use a high-quality UV resin: Different resin brands may have varying levels of hardness and scratch resistance. Consider using a high-quality UV resin specifically designed for coating purposes, as it may provide better durability and resistance to scratches.
Avoid excessive pressure: When scratching or handling the cured resin, be mindful of the pressure you apply. Excessive force or sharp objects may leave marks on the surface. Use gentle pressure and consider using a soft cloth or microfiber cloth to clean the resin.
By following these guidelines, you should be able to achieve a more durable and scratch-resistant finish with your UV resin coatings.
I coat the front and the back with uv resin and I use a nail light to cure it for a full 3 minutes, but I’ve noticed that if I scratch the cured resin it leaves I don’t think it’s a real scratch but it leaves scratch marks on the resin. Is there something I’m doing wrong?
@Dawn Thanks for your comment. Yes, UV resin can be applied on top of fully cured epoxy resin. Just make sure the epoxy resin has cured for at least 24 to 48 hours. UV resin will cure when exposed to ultraviolet light and create a glossy layer over the epoxy resin. Clean the surface before applying UV resin and follow the instructions of both products for best results.
Dawn